All events require a course saved on the system and for it to be set up as active. This functionality is available to District and Global Admins only.
This document covers how to:
1. View and administer courses
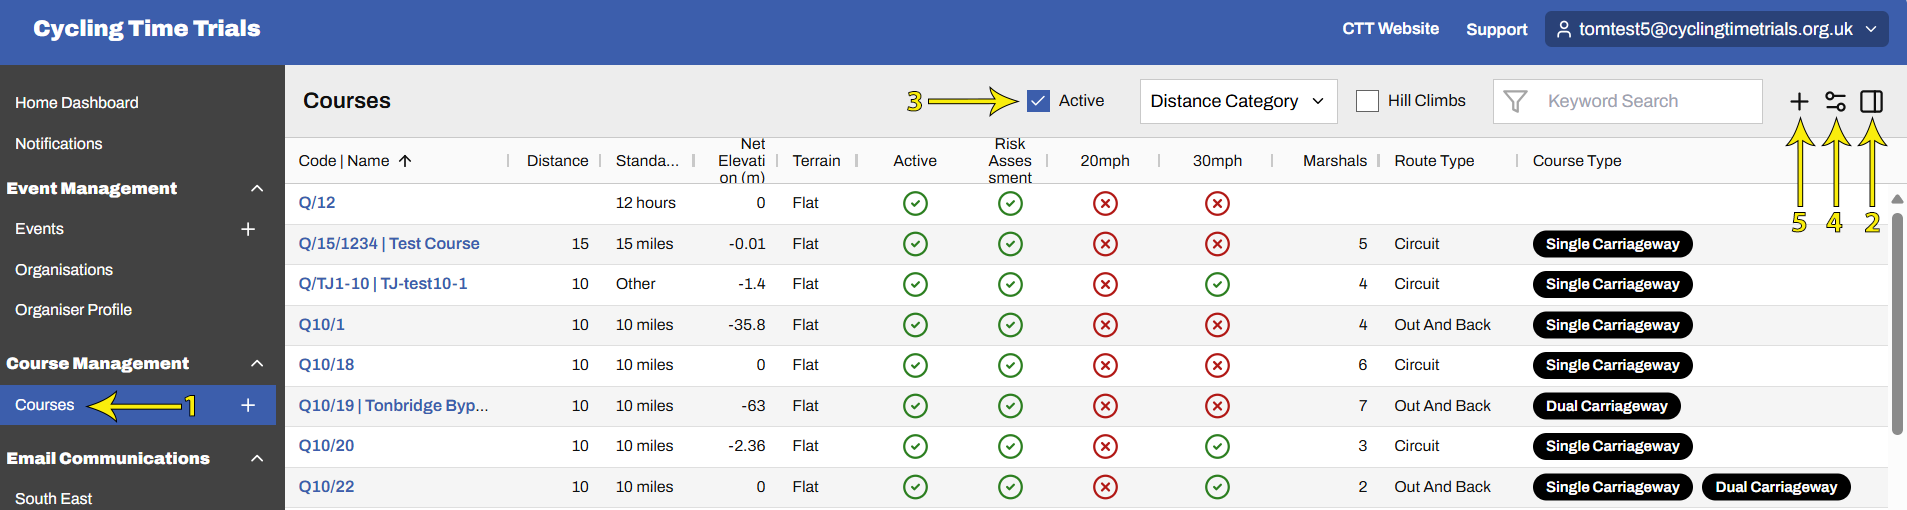
From the main admin screen (🔗) select Courses from the menu (🔗) (arrow 1 in the screen shot below)
As for any list screen, the way the data is displayed can be (2) configured (🔗) to change its order and the columns shown
To view Active courses only, select (3) Active at the top
The list may be filtered by Distance Category and searched by Keyword. (Note Keyword searches only apply to columns currently on display. For example, if you have selected (🔗) not to show course code on the screen, searching by course code will not find your course)
To Export the list to a csv file, click the "double paddle" icon, top right (4) and select Export as CSV
To Edit a course, click its Code | Name, then proceed as explained in Create New Course (🔗)
You can use the '+' icon, top right (5) to add a new course, then proceed as explained in the next section
2. Create a new course
From the main admin screen (🔗) select the '+' next to Courses from the menu (🔗)

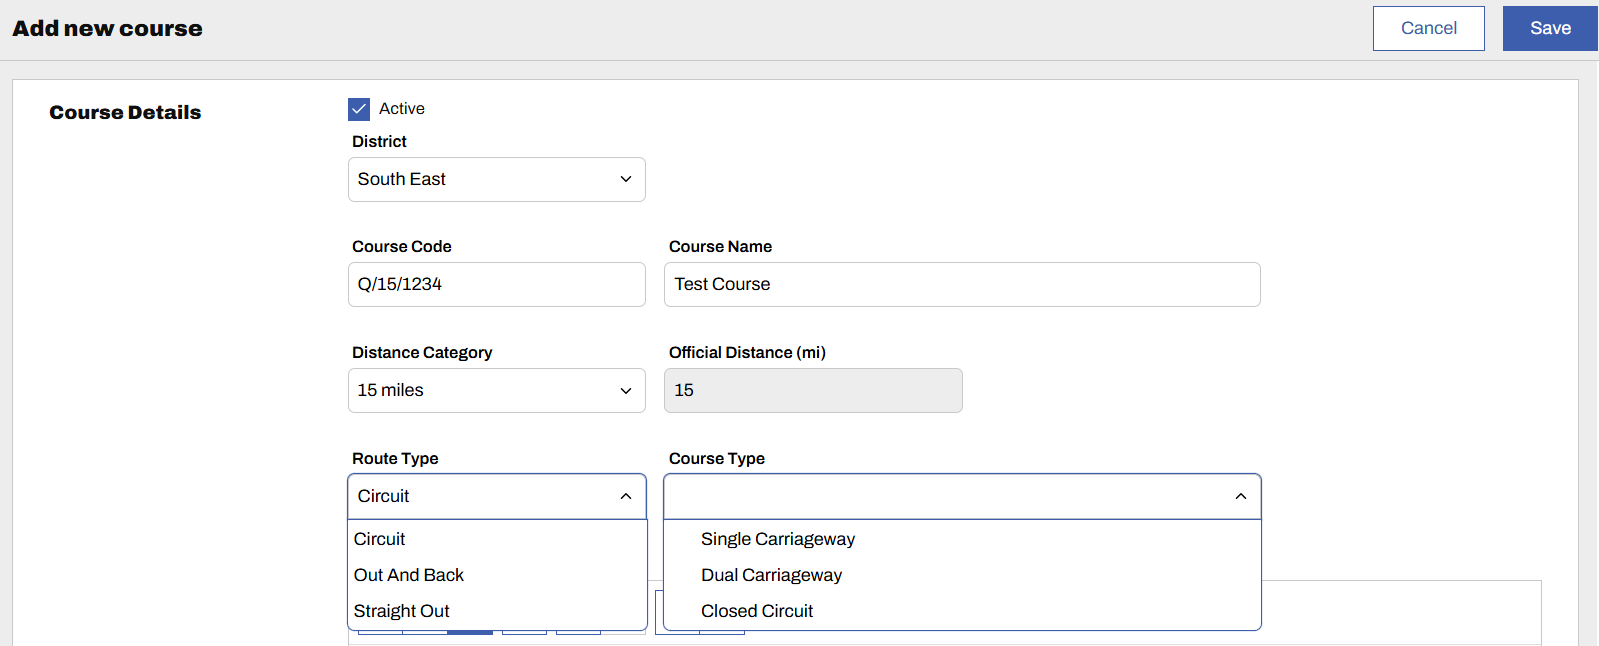
You will be presented with the Add new course popup form to complete.
If you want the course available for immediate use, select the Active box
Every course must have either a Course Code and / or a Course Name, a Distance Category and an Official Distance
Standard Distances are 10, 15, 25, 30, 50 & 100 miles, and 12hr and 24 hr. Note, 15 miles and 30 miles are now standard distances, unlike the old system. All other distances should be set to Distance Category "Other". Important: The Distance Category must be set correctly to allow for BBAR inclusion, comp records and VTTA awards
The form also asks for Route Type and Course Type (as shown below), Course Description, Course Expert, Number of Marshals and Course Restrictions. While providing this information is encouraged, for ease of course setup for planning future events, these details are optional
Any sections of 20mph / 30mph must be declared and for 20 mph the dispensation being used must be selected from the dropdown list provided when 20mph is selected
Clicking the Save button will return you to the course detail screen as illustrated in the example shown in the next section.
3. Apply a risk assessment, traffic counts and a map
Having saved the new course, next add (1) a Risk Assessment, (2) Traffic Counts and (3) a GPX route file
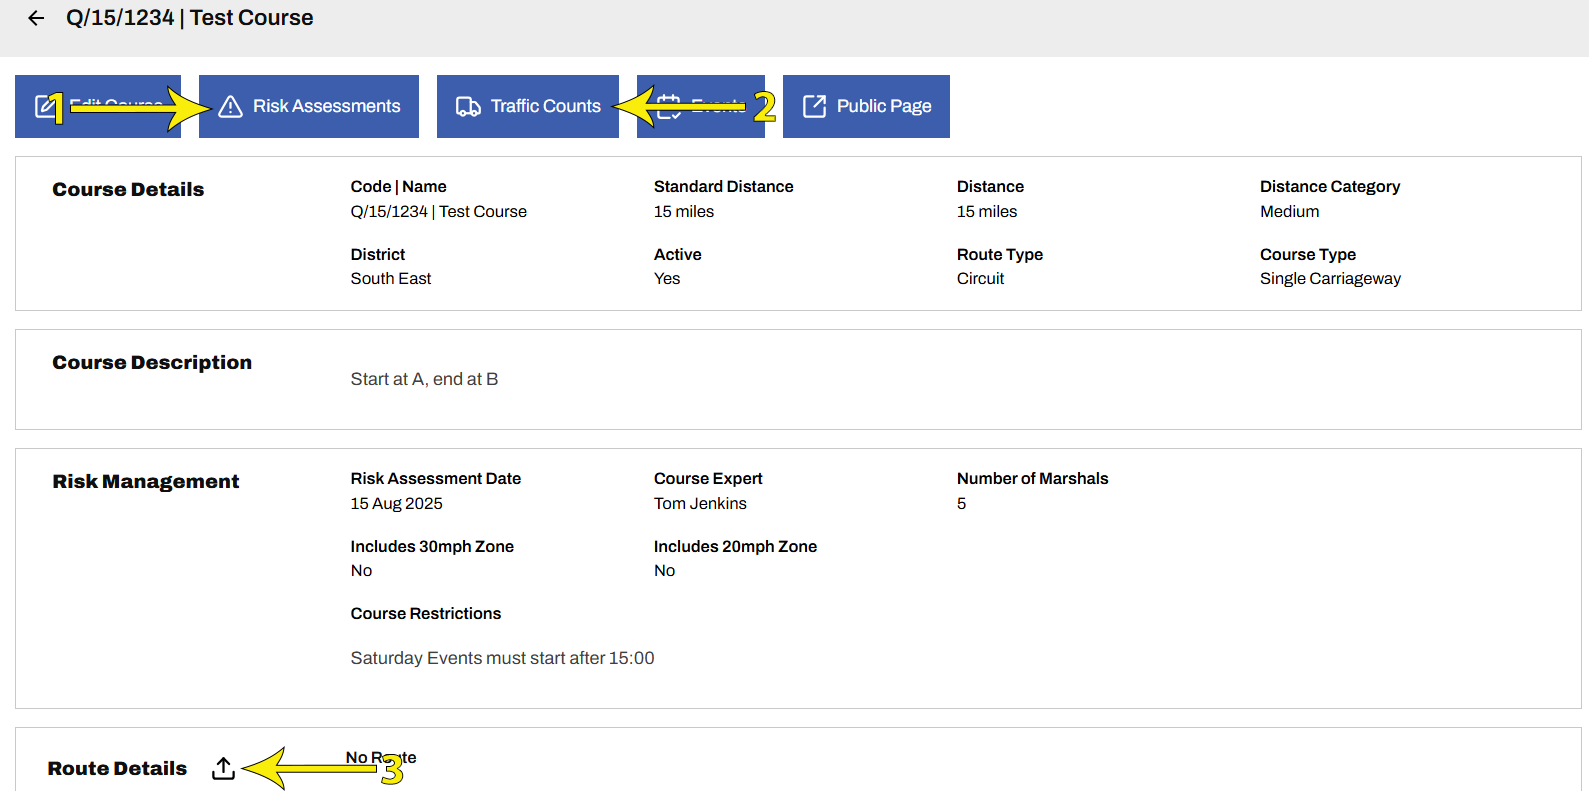
Risk Assessments are mandatory; Traffic Counts are optional, but the system provides a useful place to store their capture (you may include an upload of the count recording sheet). The system uses the course's GPX file to determine its location, so without a GPX file, events on those courses will not appear in location-based Event Finder (🔗) searches
Previous Versions of Risk Assessments are maintained on the system. Uploading a new Risk Assessment will move the current file to the Previous Versions box, available for download
Each course can only have one GPX file associated with it. Uploading a new one replaces the existing one
To add Traffic Counts, select the Traffic Counts button, as shown in the screen above, then click the '+' on the right-hand side as shown below. For more information, please refer to the Traffic Counts Guidance Note (🔗)
