The system has a built in Email Communications function for District Administrators to send group emails to any or all of the following groups within their district:
All club contacts
All organisers
All open (type A) event organisers
All club (type B) event organisers
It allows for test mails to be created and sent to the sender only, to check how the final email will look to your intended audience before committing the send.
Finally, it maintains an audit of all emails sent which may be referred back to, to check content, recipients, and whether the email has been opened and read.
This document explains how to
1. View Email History
From the admin screen (🔗); menu on the left (🔗) select your district name within Email Communications (arrow 1 in the diagram below).
The following screen lists Test Emails at the top and a full Email History at the bottom. The lists may be configured and exported (🔗) in the same way as for any list screen (arrow 2).
Lists may be filtered using the Keyword Search (arrow 3).
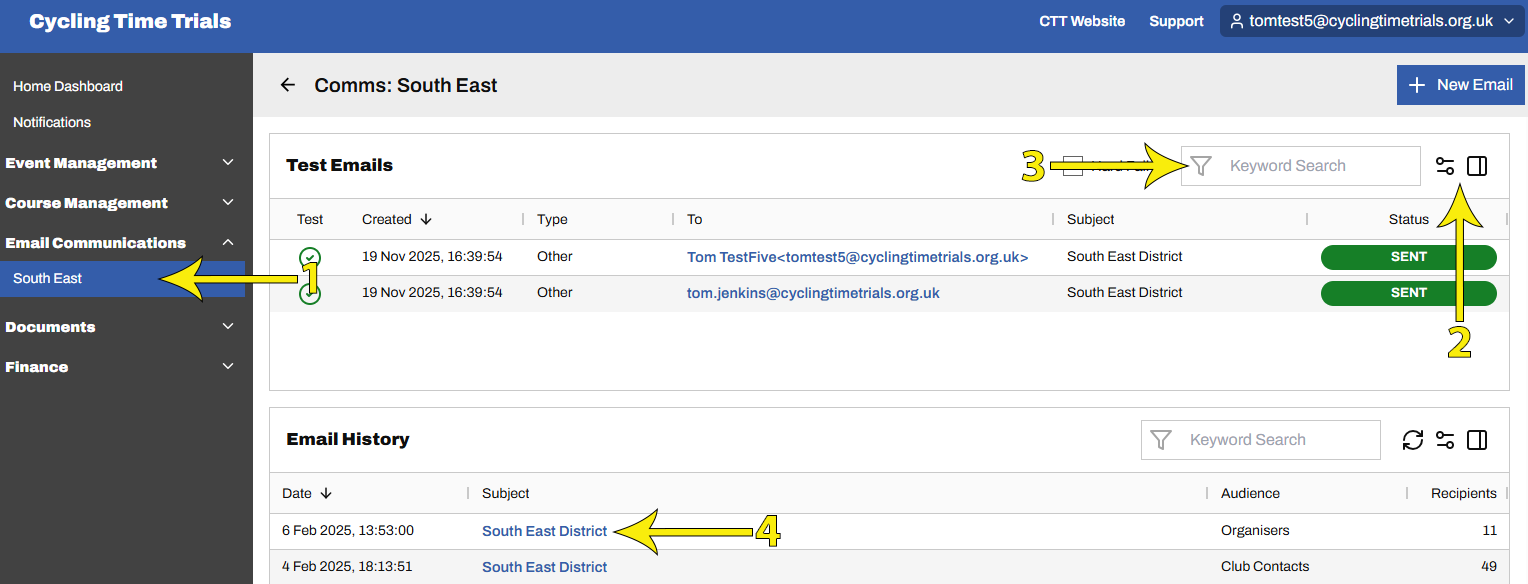
Select the email's Subject Header (arrow 4 above) which provides a table of all associated emails sent, listed by recipient.
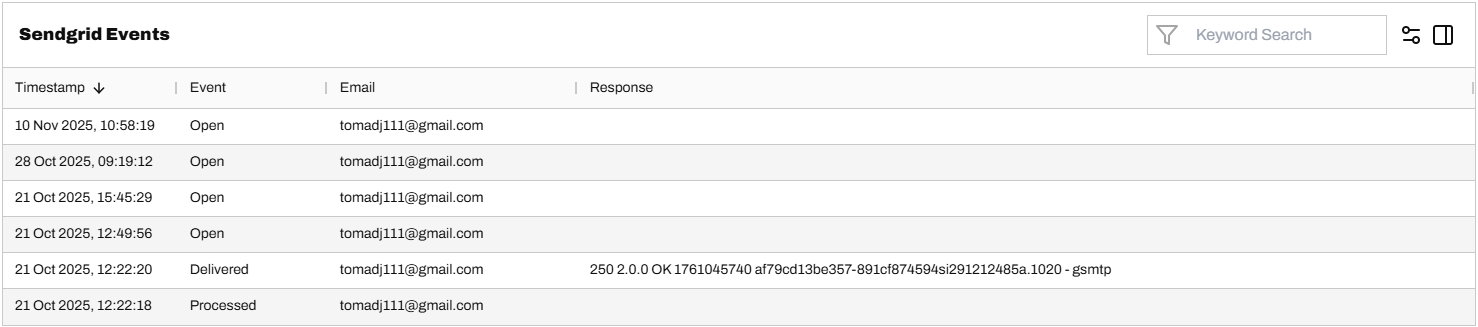
Selecting an email from that table provides the email's content and, at the bottom of the page, related SendGrid Events. SendGrid is the third-party tool CTT uses to send system emails. This section confirms delivery and if / when the email was opened and read by the recipient as shown below.
2. Create an Email
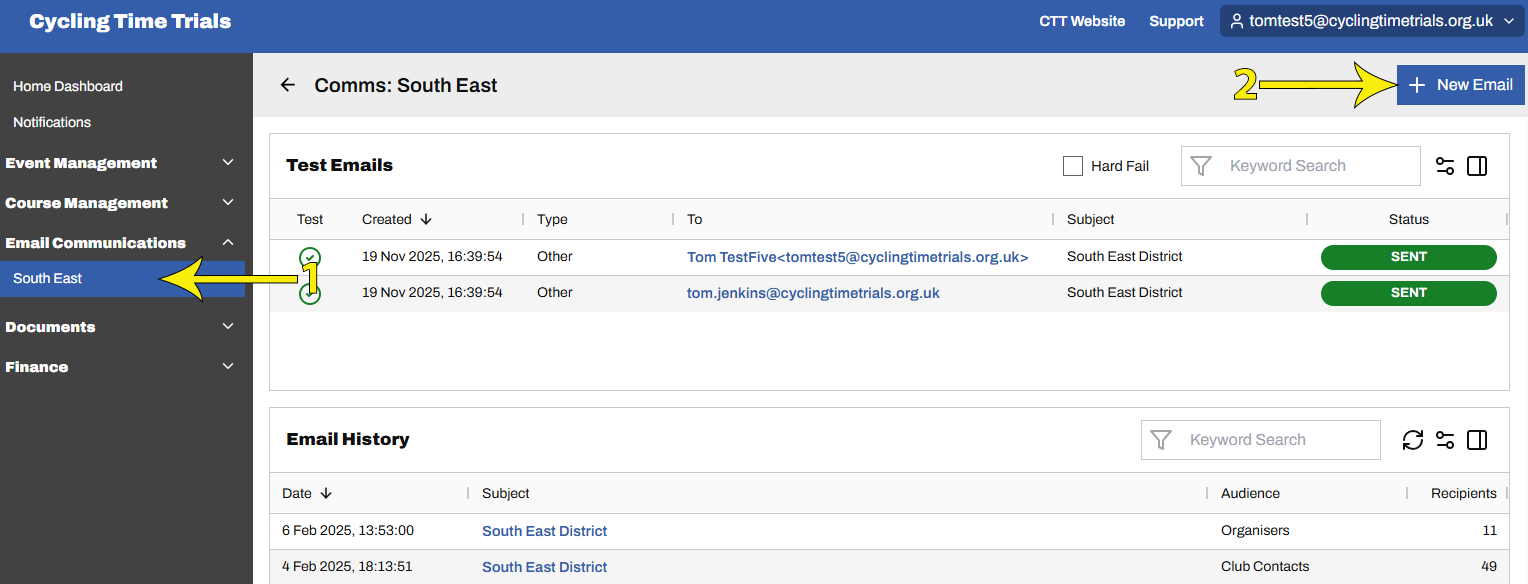
From the admin screen (🔗); menu on the left (🔗) select your district name within Email Communications (arrow 1 in the diagram below).
To create a new mail, select + New Email (arrow 2)
From the following screen, either
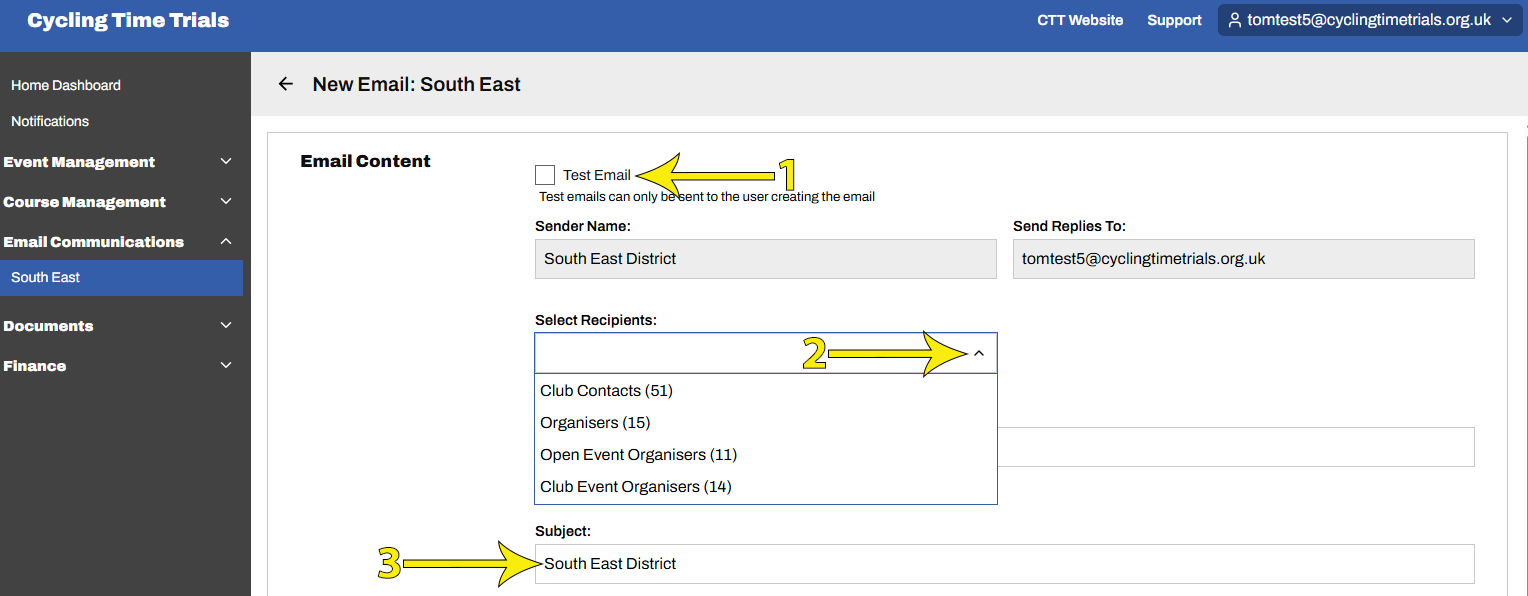
Select Test Email to send to yourself only (arrow 1 below). This allows you to check how the final email will look to your audience before committing the send. The recipient options will be greyed out. Test Emails may be duplicated and sent as final emails as explained below (🔗)
Otherwise Select Recipients from the list of options (arrow 2).
Edit the default Subject as required (arrow 3).
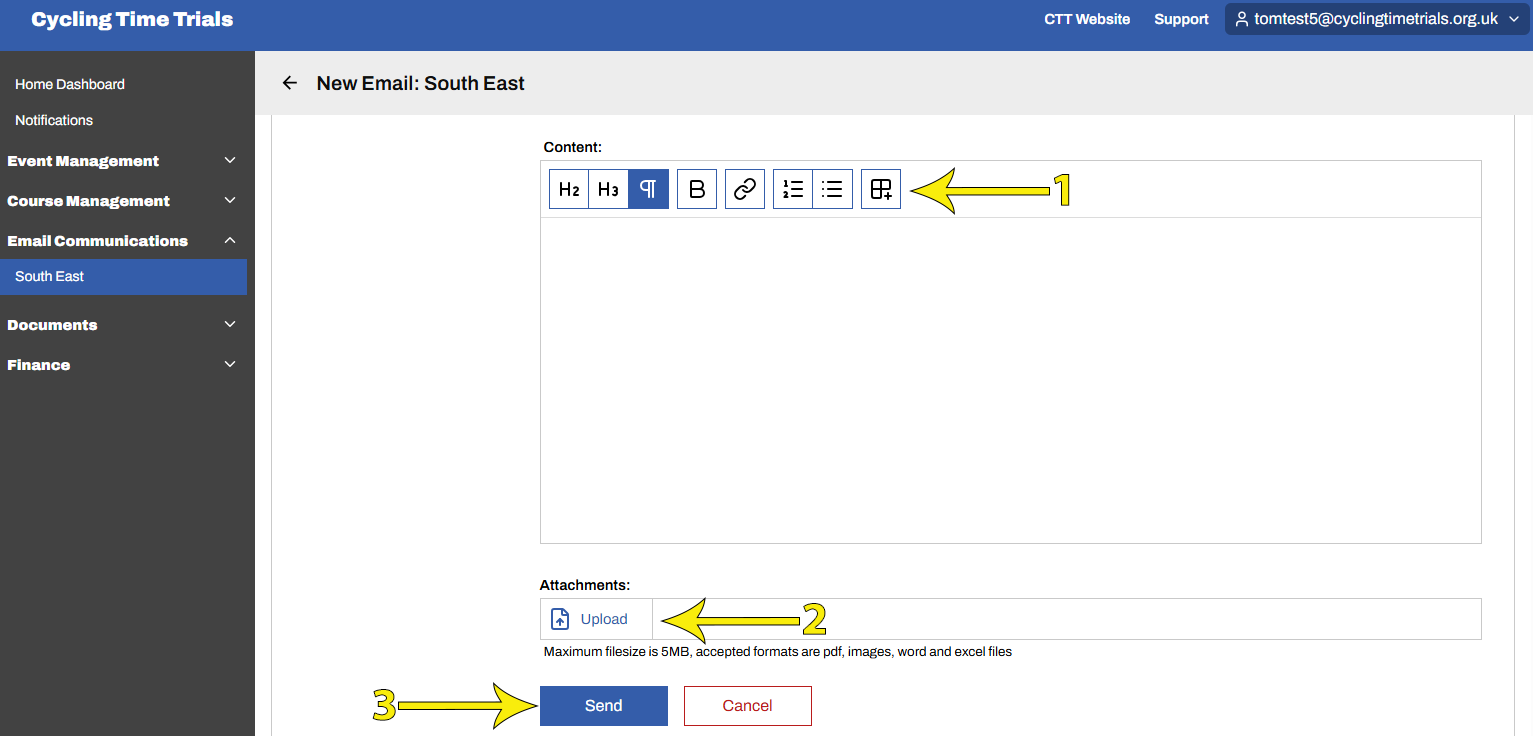
Scroll down to the Content section and start typing in the large box.
There are some basic formatting options at the top of the box (arrow 1 below). Hovering over each gives a text description. In the order they appear they are:
Large header text
Small header text
Standard text
Bold text
Add link
Add a numbered list
Add a bulleted list
Create table. If you have created a table, you'll be given further options to configure it.
You may add attachments (arrow 2)
When ready, select Send (arrow 3)
3. Duplicate a Test Email
From the email list screen (the first screen shown at the top of this document), select your test email by clicking its name. To select a test email just created, make sure the list is ordered by Created (click the header so that it says "Created⬇"), then select the email at the top.

From the next screen, select Duplicate
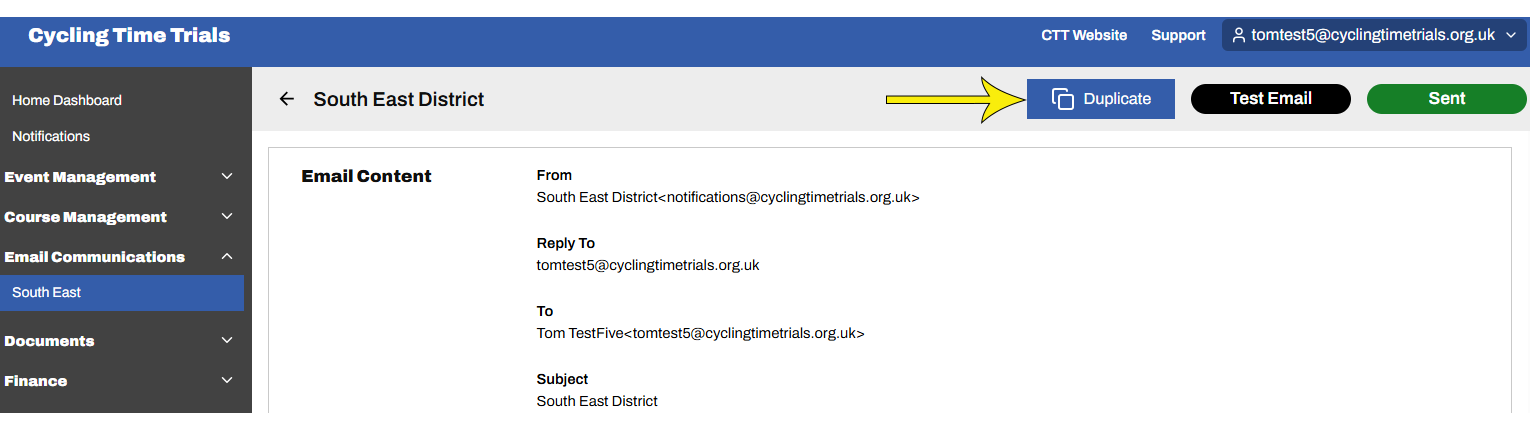
Select final recipients, check details and send as explained in Create an Email (🔗)