This document covers:
1. Viewing District Content
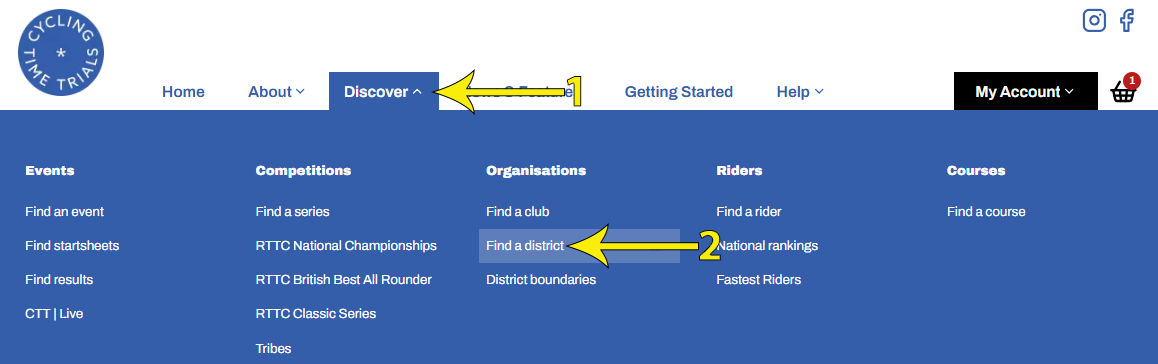
Any rider can view their district's specific content from the homepage via Discover ➯Find a District then selecting their district from the map as shown below.
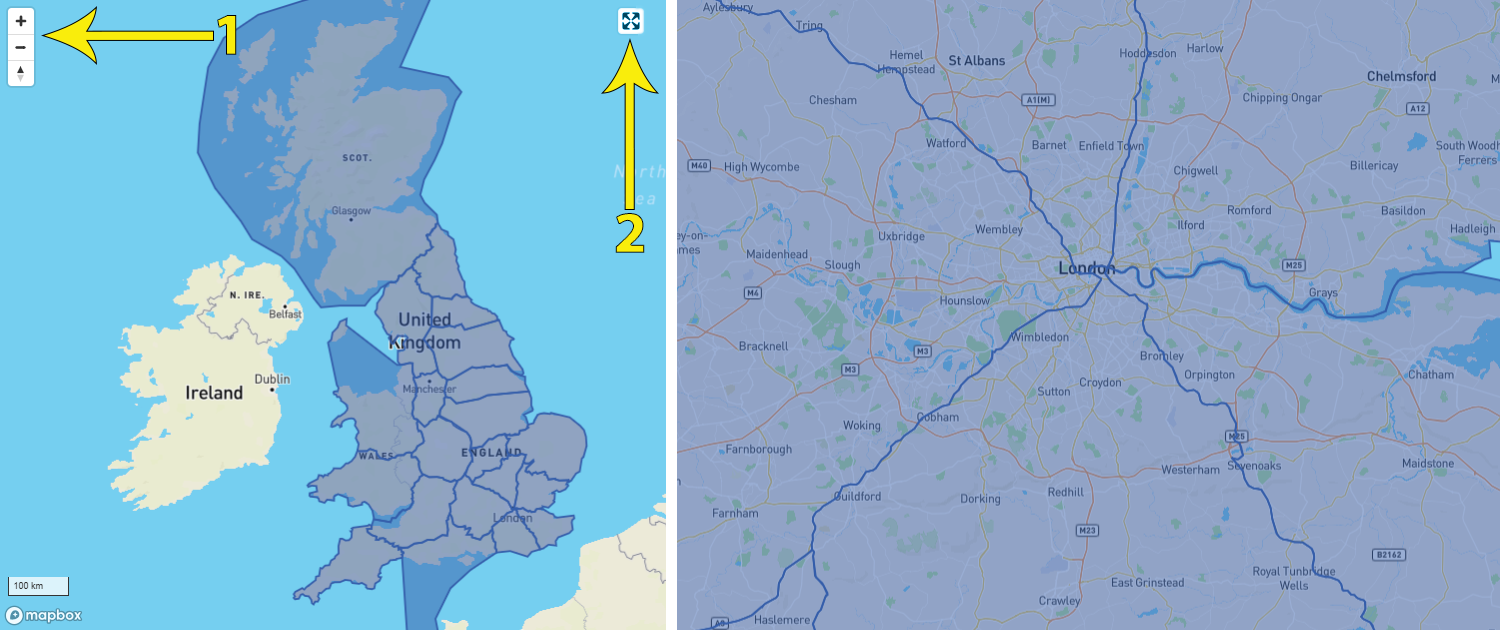
Click the + and - buttons (arrow 1 below) to zoom in and out of the map; the map can also be expanded to fill the screen (arrow 2).
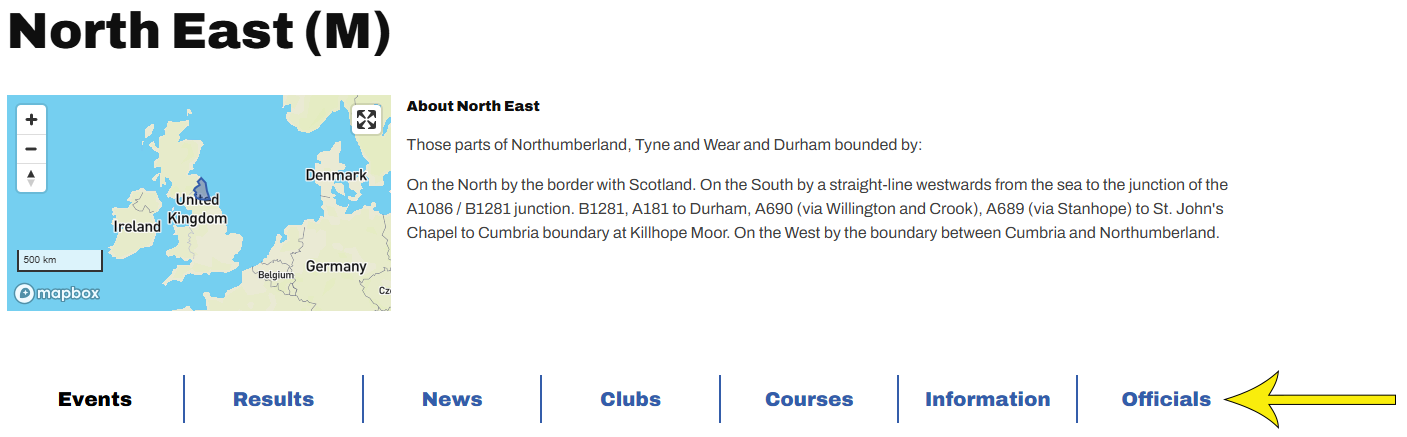
Each district's page displays a map showing its location within the country, a description (configurable (🔗) by district admin) and 7 tabs as shown below. Clicking on each provides a list of Events; Results; News articles, Clubs, Courses; Information articles and Officials local to the district. The focus of this Knowledge Base article is the administration of News, Information and Officials. Separate articles explain Club Administration (🔗) and Course Administration (🔗)
2. District site administration
From the Home Dashboard of the main admin screen (🔗), select District Administration (arrow 2)
The District's home page (🔗) can be accessed via the Public Profile Page button (arrow 3), which provides a quick and easy way to check how general users will view any changes you make to the district site.

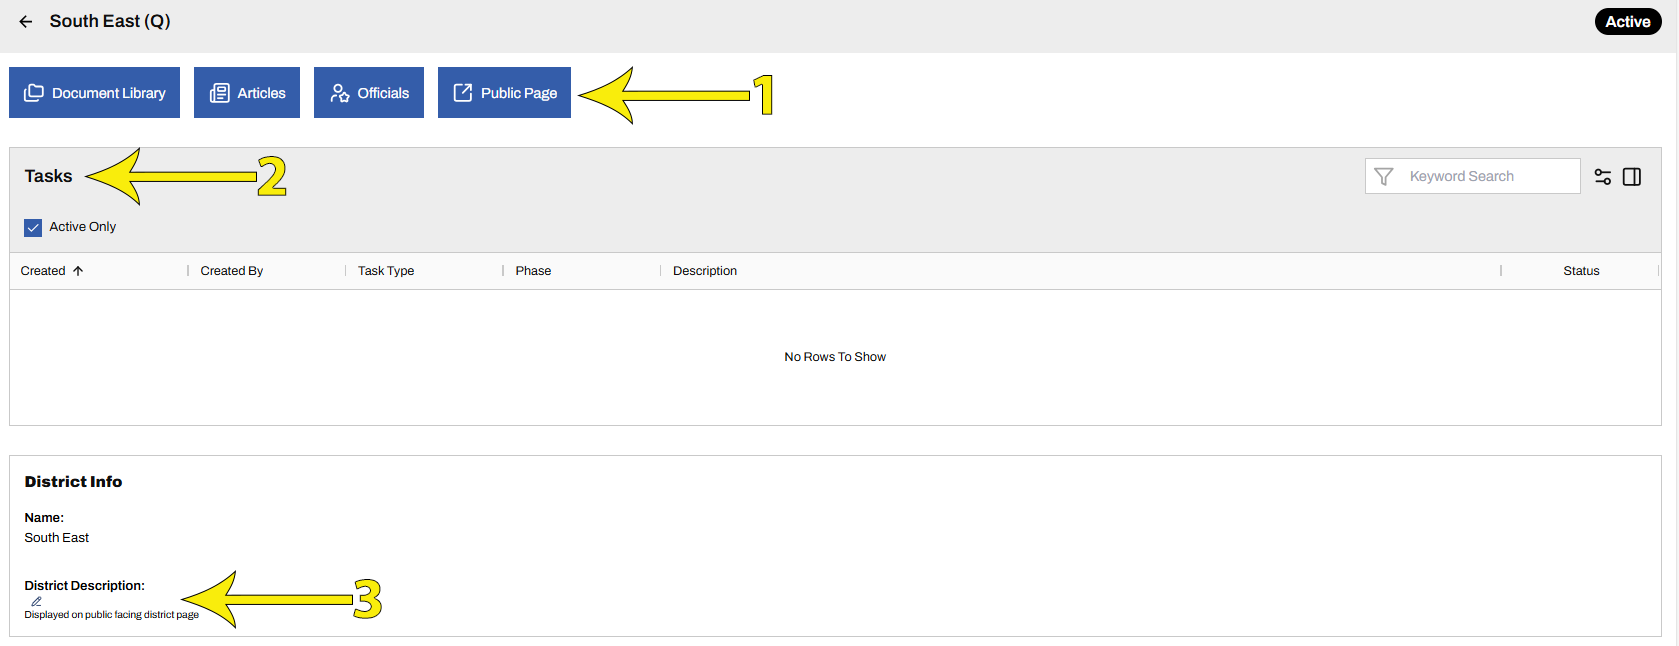
The District Administration screen provides buttons to administer documents; articles and officials (arrow 1 below), all explained later.
Below that is a Task Queue, listing actionable tasks, for example any new clubs awaiting review will appear here (arrow 2)
Finally click the pencil icon (arrow 3) to edit the District Description;
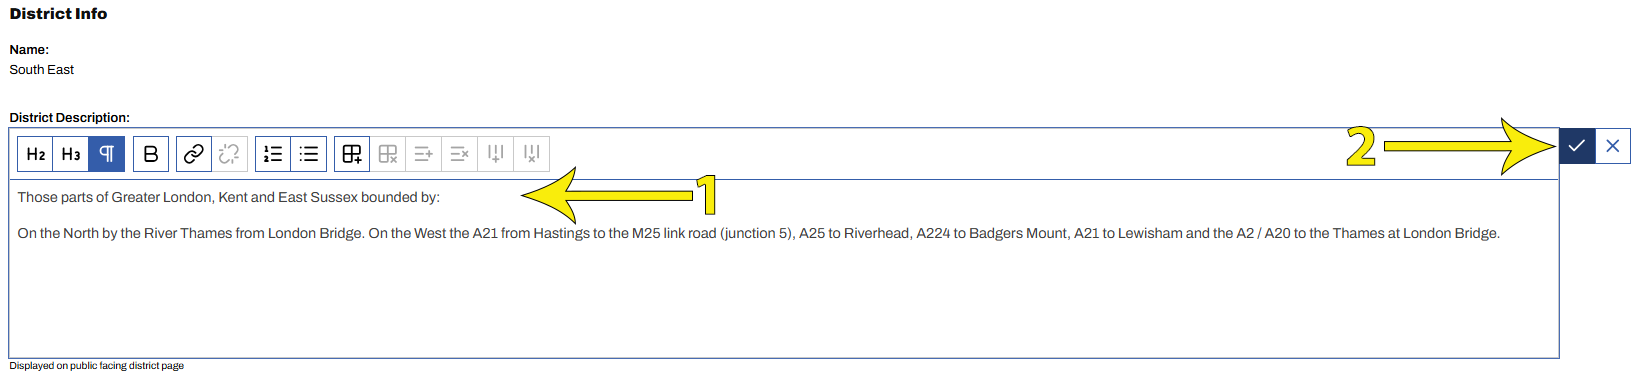
Type in the District Description box (arrow 1 below) and click ✓ to save (arrow 2).
The list of icons at the top of the District Description is explained below (🔗)
3. Adding officials
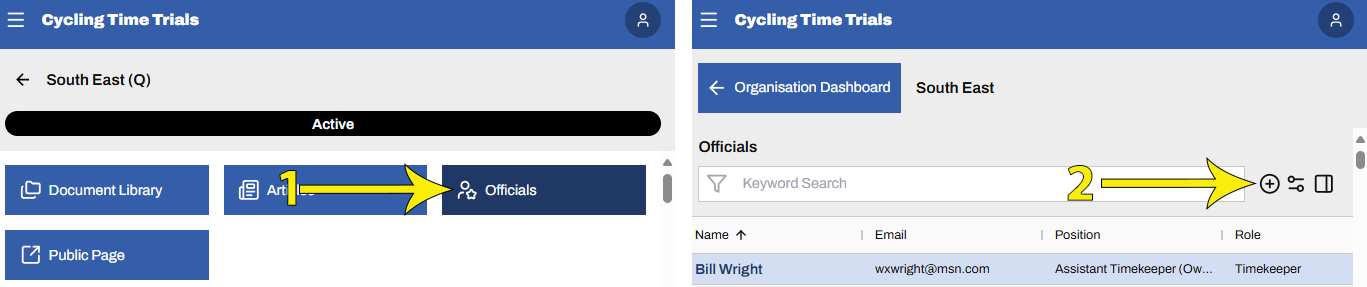
From the District Administration (🔗) page, select Officials (arrow 1) to view a list of currently assigned district officials.
Select '+' (arrow 2) to add an official
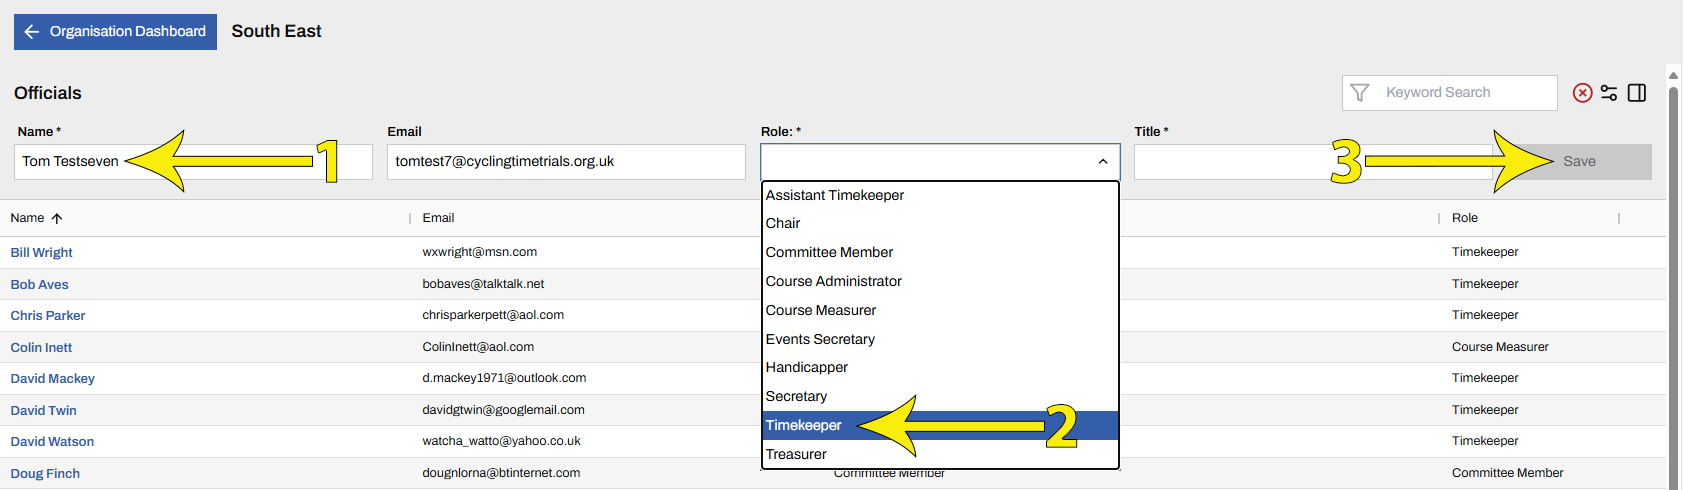
Start typing a name and select from the dropdown list of registered users (arrow 1 below)
Select the official's Role (arrow 2). Note - Timekeepers, Assistant Timekeepers, Course Measurers and Handicappers do not have district admin permissions on the site
Select Save to commit the new official (arrow 3)
To remove an official, hover over their name and click the bin icon on the right-hand side
4. Document administration
This section explains how to upload documents, which can then be linked within Articles. The next section (🔗) covers creating Articles and adding document links.
From the District Administration (🔗) page, select Document Library (arrow 1) to view a list of currently uploaded documents.
To upload a new document, select the upload icon (arrow 2)

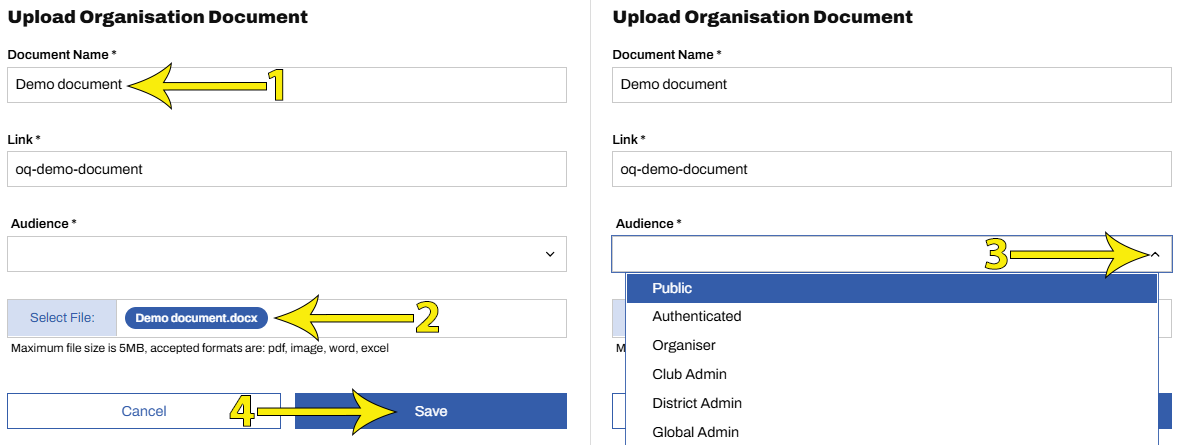
Provide a Document Name (arrow 1 below). The Link text in the next box is created by the system
Click Select File and select your document from wherever you have it saved (arrow 2)
Select Public from the Audience drop-down menu (arrow 3). If this option isn't available, the document will default to Public
Click Save
5. Article administration
Articles may be created as News or as Information
Use News for current updates and announcements, and Information for longer-term reference material
From the District Administration (🔗) page, select Articles (arrow 1) to view a list of currently created articles.

As for any list screen, the data shown and how it is displayed may be configured (🔗)
To create a new article, select '+' (arrow 1)
Alternatively, to edit an existing article, select it's name (arrow 2)

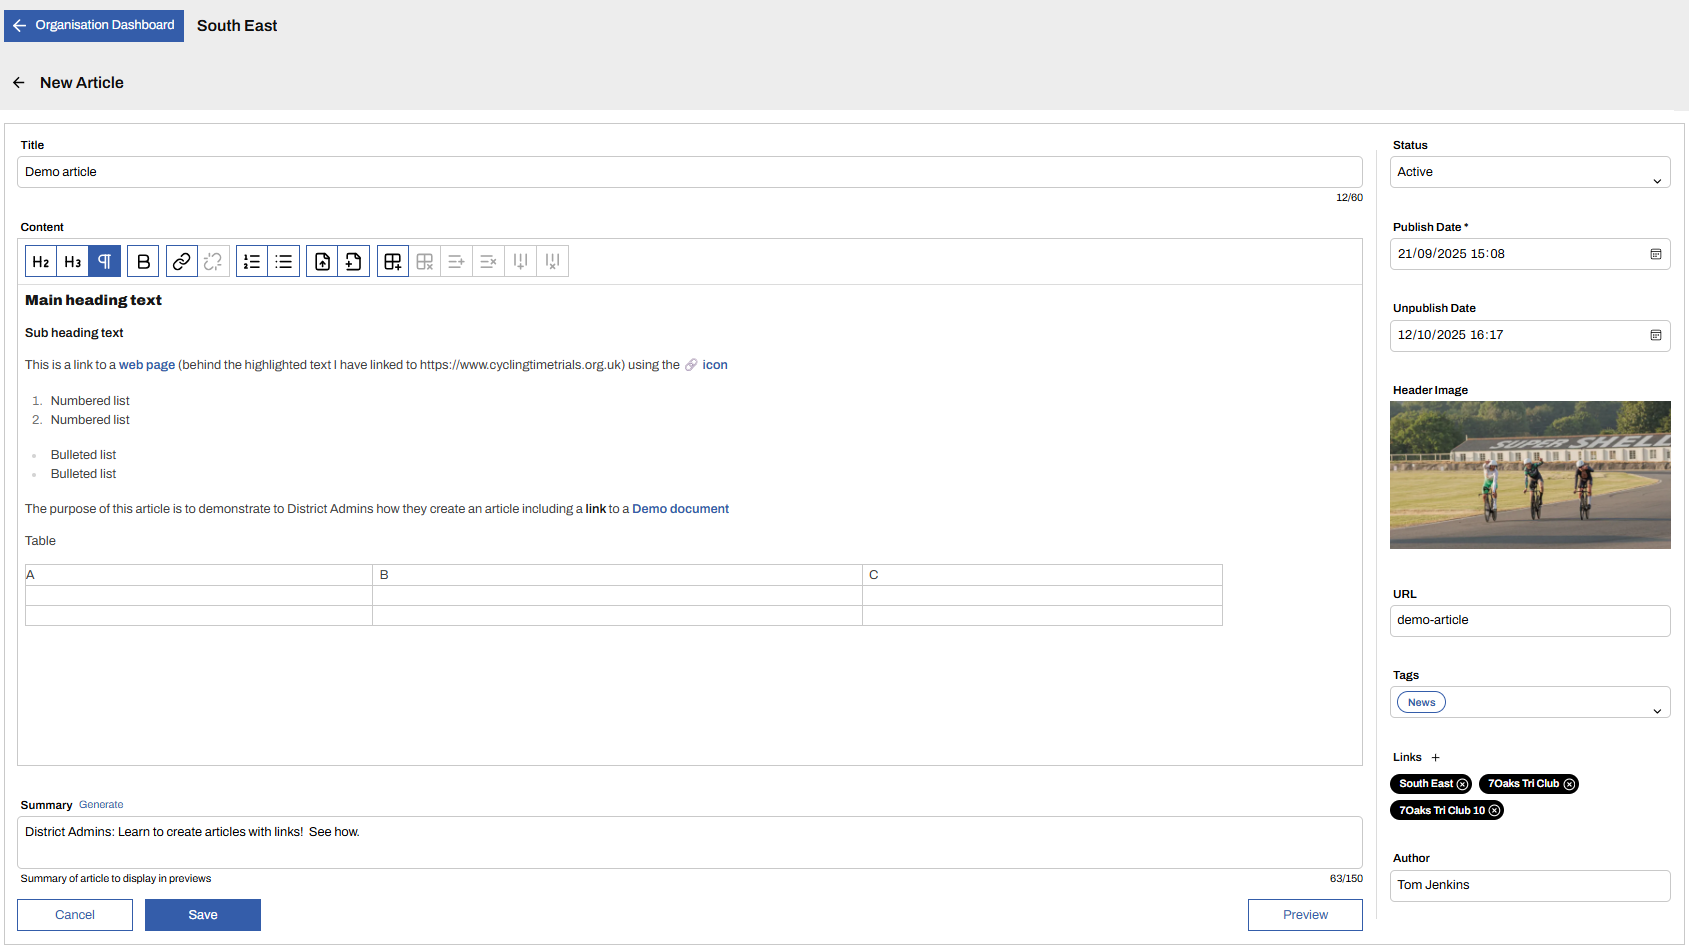
You will then be presented with the screen shown below.
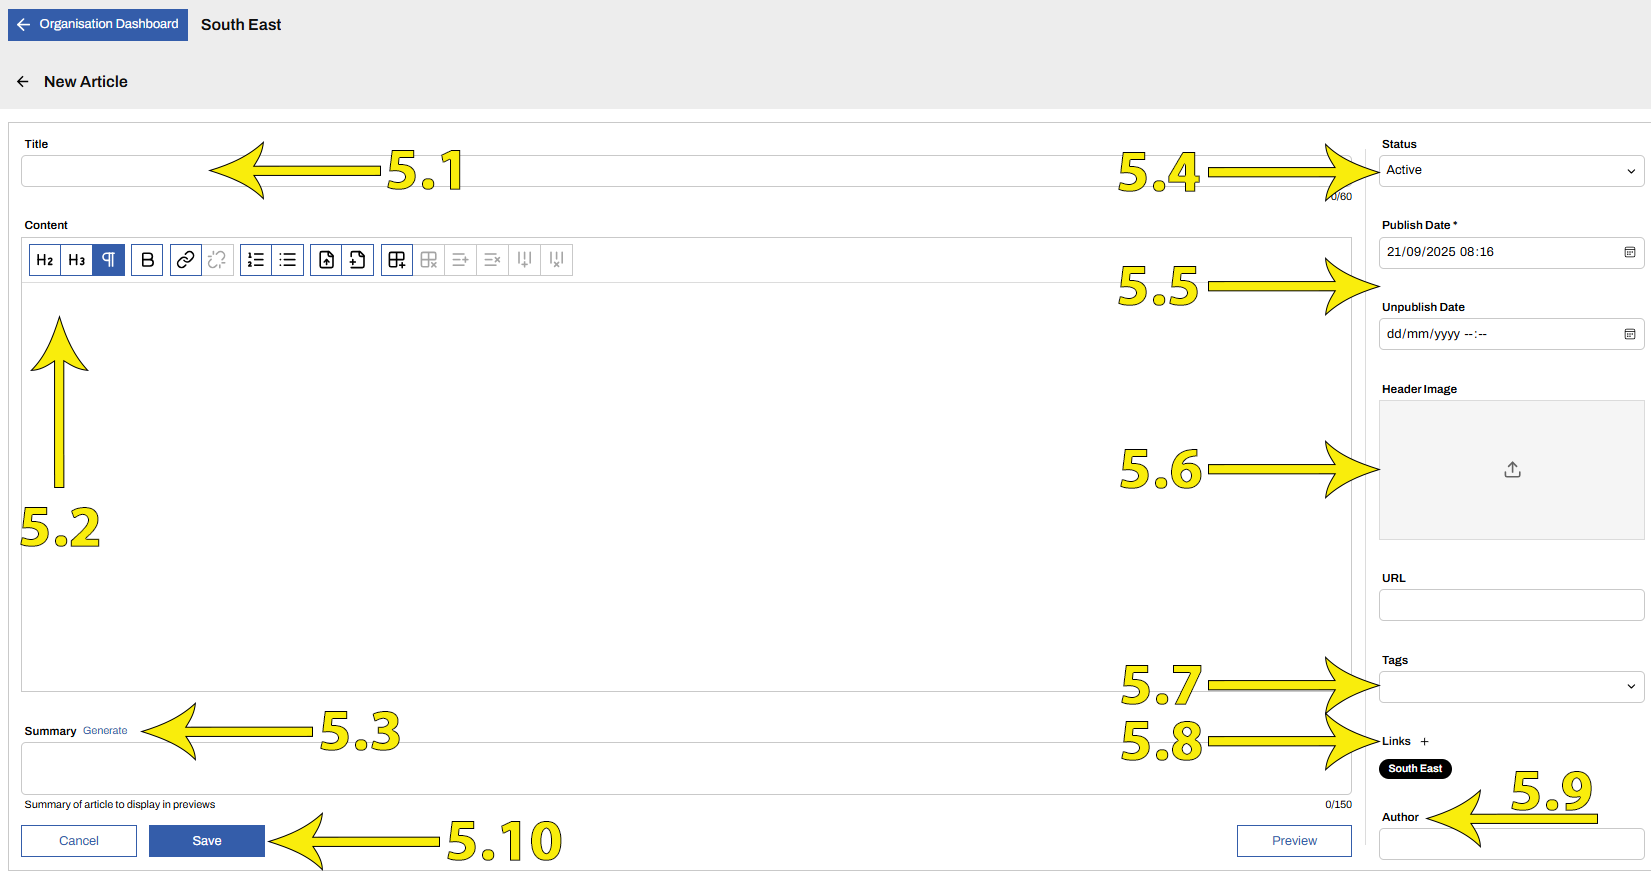
Creating and editing Articles may look complex at first, but it’s much simpler in practice than it is to describe. The many options on this screen can seem overwhelming, but you only need a few of them to get started. The subheadings below (5.1–5.10) match the arrows in the screenshot above and guide you through each step.
5.1 Create Title
This is what riders will see for each article, alongside the Summary (5.3) and the Header Image (5.6)
5.2. Add content
Type content directly into the large Content box
There are a set of icons at the top of the Content box that allow you to format how the text appears and add links in your article. Each is explained below in the order they appear.

Heading 2 - Main heading text; Select text and click icon
Heading 3 - Sub heading text; Select text and click icon
New paragraph / new line
Make text bold - Select text and click icon
Add web link - Choose text to display and the web page it links to
Remove web link - Select text and click icon
Add numbered list - Select text and click icon
Add bulleted list - Select text and click icon
Upload and link to a new document - Click Icon, upload a document and link to it
Link to an existing document (🔗) - Click Icon and select a document previously uploaded
Add table
Remove table
Insert row into table (becomes active when inside a table)
Delete row
Insert column
Delete column
5.3 Generate Summary
The summary is displayed to riders alongside the document title on the district site. Every document must have a summary
You can either write your own or click Generate for an AI generated summary based on the text in the Content box.
5.4 Select Active flag
Set the article to Active to make it available to users or Draft to hide it
5.5 Define Publish and Unpublish dates
By default, new articles will be published and available as soon as they are saved and will remain so indefinitely.
Typically, News Articles will relate to current content that you may want to auto-hide after a set date, to avoid cluttering the site with out-of-date news, whereas Information will be left open-ended
5.6 Upload Header image
Articles with images grab audience attention
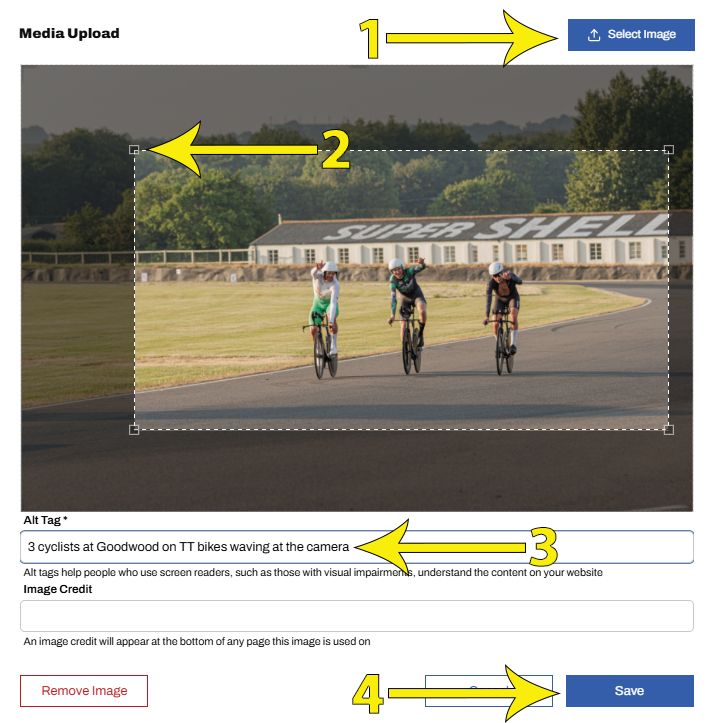
To add, click the upload icon in the Header Image box (arrow 5.6 above), then click Select Image (arrow 1 above)
Select your image from wherever it is saved
Images must be less than 10MB
Header Images are in landscape format. The image uploader provides a crop-box in the correct proportions. Click and drag the corners of the box to crop the image (arrow 2)
Provide an Alt Tag (arrow 3). Alternative Text is a brief description of the image and is an essential part of making content accessible. Alt Text is read by screen readers (or other assistive tech) to provide information about the image. Typically, 1-2 short sentences highlighting the key elements of the picture.
If appropriate, add an image credit
Finally click Save (arrow 4)
5.7 Add tags
For your article to appear under the News Tab, select News and for Information, select Reference
Click in the Tags box and select the appropriate option
5.8 Add Links
Articles may contain links to other pages within the CTT site
By default, all district articles include a link to their district's home page
To add a link, click the '+' next to the work Links (arrow 5.8 above)
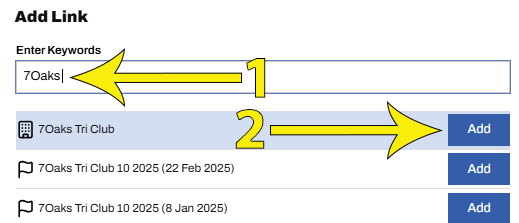
Start typing to search for a District, Event, Club or Rider (arrow 1 above) - Note, typically you would only tag a rider if the main subject of the article is the rider
Click Add (arrow 2)
5.9 Add Author
Optionally add an author
5.10 Save
By this point, your article might look something like the example below
Click Preview to check and then Save